On this page
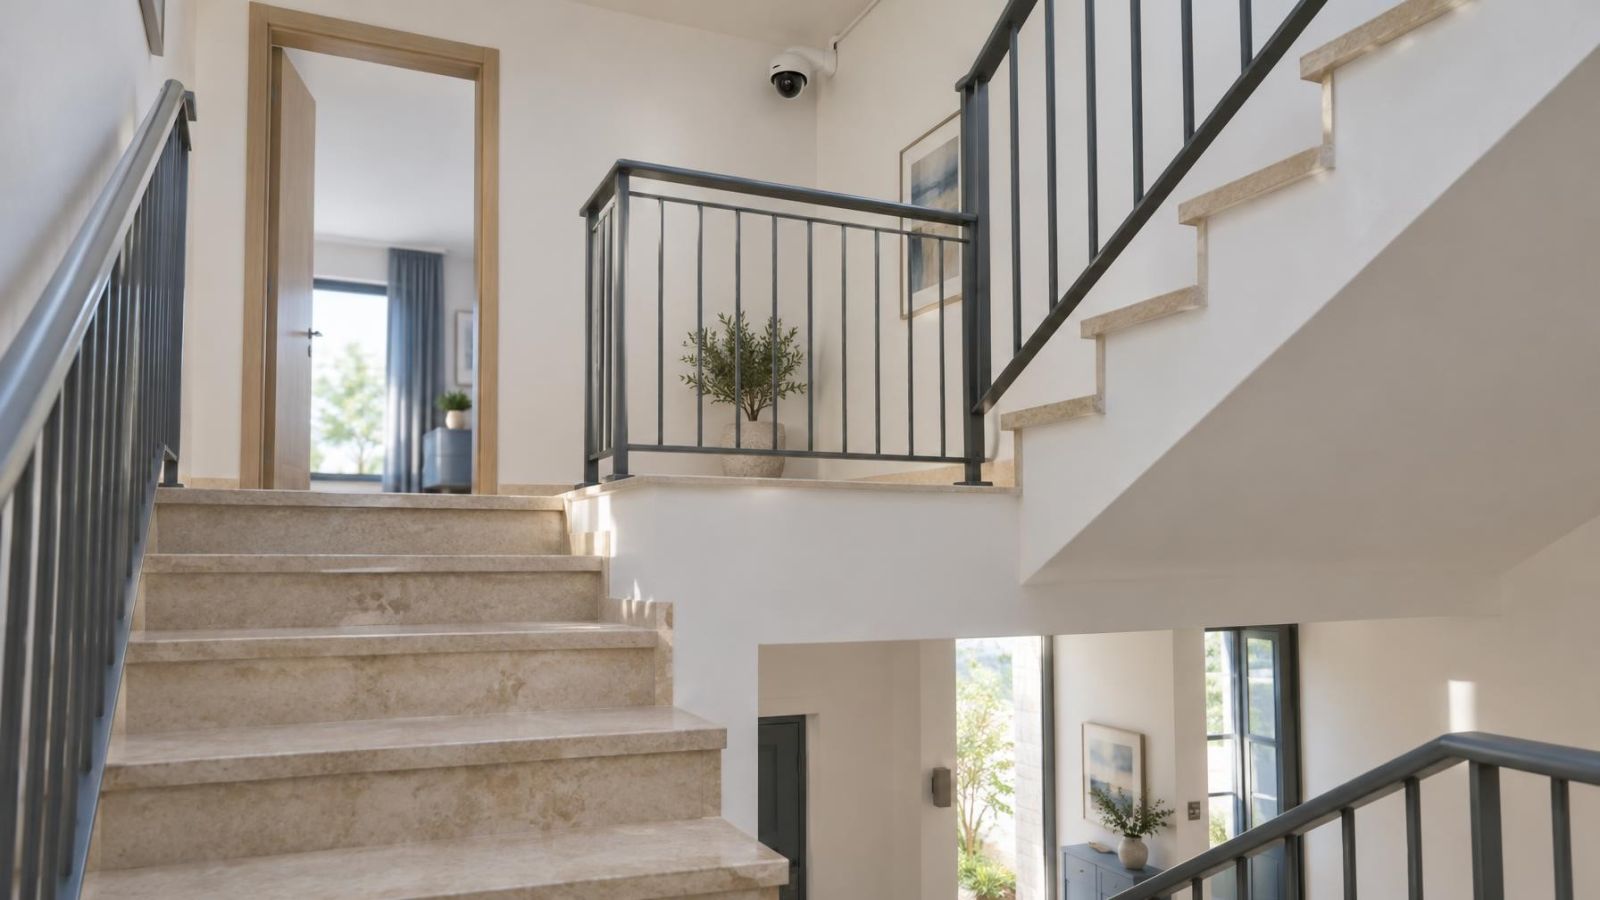
A security camera beside a stair flight may appear to cover the whole route, yet miss a face at the turn or lose movement behind the stair landing. In a split-level home, the problem becomes more complex because several routes share a small vertical space. A camera installer plans home security cameras around direction of travel, changing light and physical obstructions. This article explains how to choose and verify those positions.
Map Movement Before Placing Home Security Cameras
Begin with movement, not with the most convenient wall or ceiling. Draw a simple plan of the stair area and mark every route connecting an entrance, room, corridor or exterior door. Include routes used less often. A side door or lower-level room may send people through the scene in the opposite direction from the main route.
For each stair flight, note whether a person is moving towards or away from a possible camera position. The difference matters. A wide view of someone leaving may show clothing and direction, while an approaching view is more likely to show the front of the person. The useful direction can also change between the upper and lower parts of the same staircase.
Treat each landing as a pause and decision point. People slow down, turn, open doors and change direction there. Those movements often provide a better camera angle than movement in the middle of a flight. Mark doors that open into the stair area as well. An open door can block a view, and a person stepping through it may spend very little time in the camera's useful field of view.
- Mark the direction of approach on every connected route.
- Note where people turn, pause or reach for a door.
- Check the full swing of doors beside the stairs and landing.
- Include routes between offset floors, even when they overlap on the plan.
Choose the Useful Viewing Direction
A camera should look into an approach rather than simply point along the architectural centre line. A diagonal view across a stair flight is often more useful than a view directly from above or directly along the steps. It can show both upward movement and the point where a person reaches the landing.
Decide what deserves priority in the foreground. If the landing and its doorway are the main concern, frame those areas clearly and let the far end of the flight carry less detail. If the approach from below matters more, avoid using most of the frame on the nearby landing. Every field of view has a trade-off between area and usable detail.
Railings, half-height walls, structural beams and floor edges can divide the image into apparently open sections. The obstruction may look minor from the mounting point but cover a face from the recorded perspective. Decorative rails can be especially misleading because their gaps seem open to someone standing nearby, while several bars overlap in the camera view.
Camera Above or Below the Stairs?
Neither position is automatically better. The correct side is the one that records the most important approach with a useful face angle. A camera near the upper end may capture people as they climb and approach the landing. A camera near the lower end may suit movement descending towards an entrance or lower corridor.
Mounting high above the top step can look tidy, but a steep downward camera angle often records the top of a head rather than the face. It still shows movement, clothing and direction, yet may lose the detail that justified the position. Moving the camera sideways, reducing the angle or using a landing wall can improve the approach view without placing the equipment within easy reach.
A lower position can provide a better upward view of people climbing. It may also be more exposed to accidental knocks, deliberate interference or obstruction by furniture and open doors. Consider mounting access as well. A camera that cannot be safely reached for cleaning, adjustment or replacement is likely to receive less maintenance.
| Position | Useful when | Main limitation |
|---|---|---|
| Upper end | People approach while climbing towards the camera | A steep downward angle can hide faces |
| Lower end | People descend towards the camera or climb through an upward view | The camera may be easier to reach or obstruct |
| Side of landing | People turn between flights or pass through a doorway | Walls, doors and railings can divide the view |
Cover Landings and Split Levels
A landing is a natural transition point. It combines slower movement, a change of direction and often a doorway. Position the camera so the landing remains useful without sacrificing the approach. A frame filled mainly by the landing floor may show where someone went but little about who passed through.
Offset floors require separate sightlines. A camera facing one flight may see the next level only as a narrow strip beyond a floor edge. Rotating the lens wider does not remove the physical obstruction. Where stairs turn, overlapping coverage allows one view to continue as the other becomes blocked.
Doorways need similar care. A camera aimed directly at a door may lose the stair movement, while a camera aimed only along the flight may record a person after they have already turned away. A diagonal position can sometimes include both. If the views conflict, use separate cameras rather than forcing one frame to perform two different jobs.
The best position is rarely the point that sees the most floor. It is the point that sees the most useful part of each approach.
Control Light and Night Images
Stairwells often connect areas with very different light. A bright window or entrance behind a person can make the foreground appear dark. WDR (wide dynamic range) can help balance the scene, but placement still matters. If possible, change the angle so the brightest opening sits to one side rather than directly behind the route.
Strong sun can move across windows, pale walls and glossy floors. A view that looks balanced at one part of the day may develop glare or deep contrast later. Check likely lighting extremes instead of approving the camera from a single daytime image.
Night vision introduces another set of reflections. Infrared illumination can bounce from a nearby wall, glass panel, polished railing or glossy paint. The bright reflected area may cause the rest of the scene to appear darker. A lens placed close to a wall can also illuminate marks, dust or insects directly in front of it.
Keep nearby surfaces outside the immediate infrared beam where practical. If connected levels have very different lighting, modest and consistent ambient light can produce a more balanced result than relying on the camera's IR alone. Check the night image with doors in their normal positions, because glass and pale door surfaces can change the reflection pattern.
Plan Detection and Cable Routes
Motion detection generally works best when a person crosses the image rather than moving directly towards the lens from far away. A diagonal stair view supports that pattern. Set detection zones around the steps, landing and relevant doorways while excluding windows, moving shadows or unrelated corridors where possible.
Do not make the detection zone so narrow that a person crosses it between recorded frames or only after turning away. Test climbing, descending, pausing and opening each connected door. Detection is a trigger for recording or notification; it is not a substitute for a clear continuous view.
A stable wired connection is usually preferable where cable routing is practical. PoE (power over Ethernet) can carry network data and power through one cable to an NVR (network video recorder) or network switch. Route the cable through protected corners, ceiling spaces or enclosed surface channels rather than leaving a loose run beside handrails or steps.
A Wi-Fi camera needs a reliable signal at the final mounting point, not merely at the landing below. Floors, dense walls, metal framing and service spaces can weaken the connection. Test with doors closed and the network under normal use. Also plan how the camera receives continuous power; a strong wireless connection does not solve an inconvenient or exposed power route.
Can One Camera Cover Every Level?
One camera can provide a broad overview of an open stair area, but it rarely gives equal detail on every flight and landing. A wide-angle lens includes more of the scene by making distant subjects smaller. People close to the lens may also appear stretched near the image edges.
Conflicting viewing directions are the larger problem. A position that records an approaching face on the lower flight may see only the back of someone on the upper flight. Floor edges, walls and railings can create further blind spots. Separate security cameras are usually more useful when levels are offset, stairs reverse direction or important doors face different ways.
Is a 360 Degree Camera Suitable for an Open Landing?
A panoramic or 360 camera can give valuable orientation at an open central landing. It can show which flight or corridor a person used without mechanically turning towards the event. However, broad coverage does not create equal detail everywhere. Distant flights remain distant, and faces near the edge of a processed view may be distorted.
Use a panoramic camera when the main purpose is an overview of several nearby routes. Add directed views when a particular doorway or approach needs clearer detail. Avoid mounting it so close to a wall, beam or hanging light that a large part of its circular view is permanently blocked.
Test Before Final Mounting
Temporary testing is part of placement, not a final courtesy check. Secure the camera safely near the proposed position, connect it to the recorder or VMS (video management software), and inspect the recorded view. Live viewing alone can miss compression effects, detection delays and differences between daytime colour and night vision.
- Walk towards and away from the camera on every connected flight, corridor and doorway.
- Pause and turn at each landing as a person normally would.
- Open nearby doors through their full swing and repeat the routes.
- Review the image during bright conditions, ordinary interior lighting and darkness.
- Check whether railings, floor edges or walls cover faces at any point.
- Adjust the camera angle and motion detection zones, then repeat the test before fixing the mount.
Review the recording on the screen normally used for playback. Do not judge only from a small preview. Look closely at the moments when a person enters the frame, crosses behind a railing and changes level. Testing from the recorded image reveals blind spots that are easy to miss while standing beside the camera.
Key takeaways
- Stair camera placement should follow the direction people travel rather than the symmetry of the room.
- A landing often provides the clearest view of turns, doorways and movement between levels.
- Backlighting and infrared reflections can remove useful detail even when the whole stair area remains visible.
- Offset stairs and obstructed sightlines often need overlapping coverage from separate cameras.
- Final placement should be judged from recorded footage rather than from the view beside the camera.